
This guide demonstrates a step-by-step process for deploying DeepSeek on a virtual machine (VM) using Ollama and Open WebUI. By the end of this tutorial, a fully functional AI chatbot will be running locally.
What is DeepSeek?
DeepSeek, an advanced open-source lightweight model, optimizes reasoning and coding tasks. As an alternative to ChatGPT, it is gaining popularity due to its local AI capabilities, eliminating the need for cloud APIs.
Why Use Ollama for deploying deepseek locally?
Ollama efficiently runs large language models on a local machine with its lightweight framework. The following benefits make it a preferred choice:
- Easy Model Management —With a single command, users can download, switch, and run models for easy management.
- Local Processing — No reliance on external APIs ensures privacy and security.
- Optimized Performance — The system efficiently utilizes resources for smooth inference.
- Multi-Model Support — DeepSeek, Llama, and Mistral are among the supported models.
Setting Up the Environment
Step 1: Deploy a VM
Set up a virtual machine instance on a cloud platform like Google Cloud Platform (GCP) or AWS. This demonstration uses GCP.
Step 2: Install Ollama
Install Ollama using the following command:
curl -fsSL https://ollama.ai/install.sh | sh
After installation, Ollama automatically checks for GPU availability and runs in CPU-only mode if it does not detect a GPU.
Step 3: Verify Ollama Installation
Execute the following command to verify a successful installation:
ollama --help
If Ollama is running, it will display available options.
Step 4: Download and Run DeepSeek
DeepSeek models of various sizes (1.5B, 7B, and 67B parametersThis setup uses the 1.5B model, which is around 1.1GB in size.
ollama run deepseek-r1:1.5b
Once downloaded, a prompt will be available for user interaction.
Deploying Open WebUI
To create a web-based experience similar to ChatGPT, install Open WebUI using Docker Compose.
Step 5: Install Docker Compose
First, update the system:
sudo apt update
Then, install Docker Compose:
sudo apt install docker-compose -y
Step 6: Stop Ollama Service
Since Ollama runs inside Docker, stop the previously running service before proceeding.
sudo systemctl stop ollama
Step 7: Clone Open WebUI Repository and Configure
The Open WebUI repository must be cloned, and configuration updates should be made in the docker-compose.yml file.
git clone https://github.com/open-webui/open-webui.git
cd open-webui
Modify docker-compose.yml to update the public IP address and base URL configuration.
services:
  ollama:
    volumes:
      - ollama:/root/.ollama
    container_name: ollama
    pull_policy: always
    tty: true
    restart: unless-stopped
    image: ollama/ollama:${OLLAMA_DOCKER_TAG-latest}

  open-webui:
    platform: linux/amd64
    build:
      context: .
      args:
        OLLAMA_BASE_URL: 'http://ollama:11434'
      dockerfile: Dockerfile
    image: ghcr.io/open-webui/open-webui:${WEBUI_DOCKER_TAG-main}
    container_name: open-webui
    volumes:
      - open-webui:/app/backend/data
    depends_on:
      - ollama
    ports:
      - "0.0.0.0:80:8080"
    environment:
      OLLAMA_BASE_URL: http://ollama:11434
    extra_hosts:
      - host.docker.internal:host-gateway
    restart: unless-stopped

volumes:
  ollama: {}
  open-webui: {}
Step 8: Start Open WebUI Using Docker Compose
docker-compose up -d
If an error related to Buildx occurs, install it using:
mkdir -p ~/.docker/cli-plugins
curl -fsSL https://github.com/docker/buildx/releases/latest/download/buildx-linux-amd64 -o ~/.docker/cli-plugins/docker-buildx
chmod +x ~/.docker/cli-plugins/docker-buildx
Then restart Docker Compose:
docker-compose down && docker-compose up -d
Deploy Open WebUI, making it accessible via the VM’s public IP.
Configuring Open WebUI
Create an admin account upon first access. After logging in, add the DeepSeek model by navigating to Admin Settings > Connections and selecting Ollama API instead of OpenAI API. Then, download the model within the UI.
Verifying Deployment of ollama and openwebui
Run the following command to check if containers are running:
docker ps
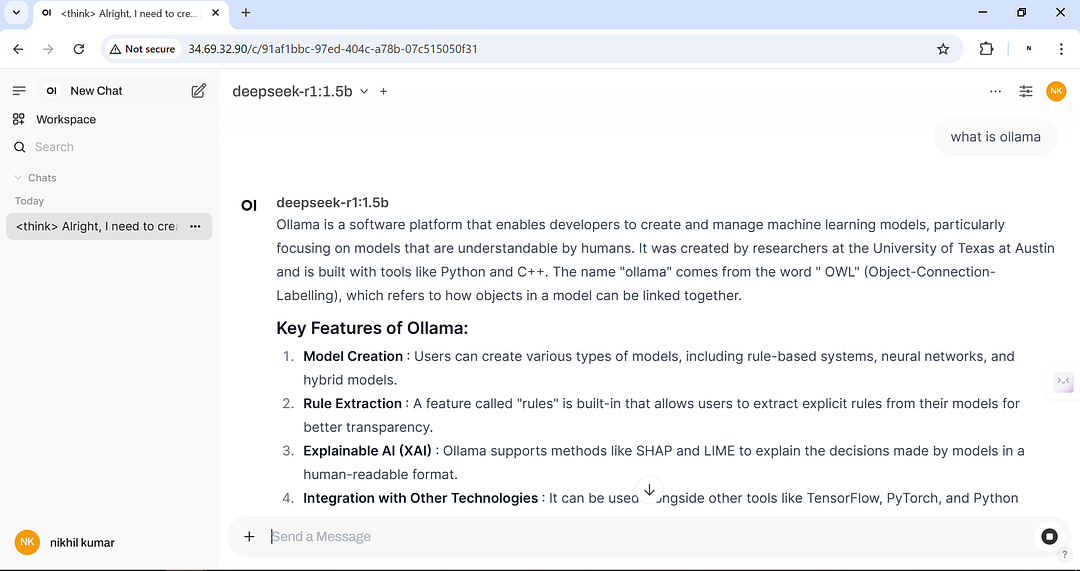
The Open WebUI portal will now be available and fully functional.
Alternative Approach: Using LM Studio
Use LM Studio as an alternative tool to deploy DeepSeek without a Linux VM. It supports Windows, Mac, and Linux, providing a ChatGPT-like UI.
Steps to Install LM Studio
- Download LM Studio from its official website.
- Install it on a preferred operating system.
- Load and run DeepSeek models within the LM Studio interface.
Conclusion
DeepSeek has been successfully deployed on a GCP VM using Ollama and Open WebUI. With this setup, an AI chatbot is running locally, ensuring data privacy while leveraging powerful AI capabilities. Whether using Open WebUI or LM Studio, a seamless experience for running local AI models is achieved.
If this guide was helpful, consider sharing your thoughts in the comments. Stay tuned for more tutorials!
Learn more about AI and related topics on my blog – check here
Explore Ollama: https://ollama.com
Check out Open WebUI: https://github.com/open-webui/open-webui

Pingback: Deploying DeepSeek on a VM Using Ollama and Open WebUI | by Nikhil Kumar | techbeatly | Feb, 2025 – Finance StarGate
Pingback: AI-Powered PDF Search with LlamaIndex, Ollama & DeepSeek - Techi Nik
Pingback: How to Deploy Ollama on Kubernetes | AI Model Serving on k8s - Techi Nik