Continuous Integration and Continuous Deployment (CI/CD) are vital in today’s software development landscape, ensuring faster delivery and higher quality. GitHub Actions, an integrated CI/CD automation platform within GitHub, is an excellent tool to automate various tasks seamlessly. If you’re new to GitHub Actions, this guide will help you understand its fundamentals and create your first automated workflow.
What are GitHub Actions?
GitHub Actions simplifies automation for developers, enabling them to build, test, and deploy directly from their repositories. With its native integration into GitHub, Actions requires no external setup. The platform offers a vast marketplace filled with pre-built actions for various tasks, from code linting to deployment. It’s free for public repositories and affordable for private ones, making it an accessible choice for developers and teams.
Why Choose GitHub Actions for CI/CD?
- Ease of Use: GitHub Actions is natively integrated, eliminating the need for complex configurations.
- Extensive Marketplace: A wide range of reusable actions are available to streamline your workflows.
- Affordability: Public repositories can use it at no cost, while private repositories have reasonable pricing options.
By automating repetitive tasks like code scanning, security checks, and deployments, GitHub Actions boosts productivity and ensures a streamlined development process.
Building Your First Workflow
Creating a basic GitHub Actions workflow is straightforward. Follow these steps to get started:
- Create a Repository: Start by creating a new GitHub repository.
- Set Up the Workflow Directory: In the repository’s root directory, create a folder named
.github/workflows. - Define the Workflow File: Inside the
workflowsfolder, create a file namedhello_world.yml. This file will define the workflow.
Example Workflow:
name: Hello World Workflow

on:
  push:
    branches:
      - main

jobs:
  say_hello:
    runs-on: ubuntu-latest
    steps:
      - name: Print a message
        run: echo "Hello, GitHub Actions!"
4. Commit and Push Changes: Commit the changes and push them to the main branch of your repository.
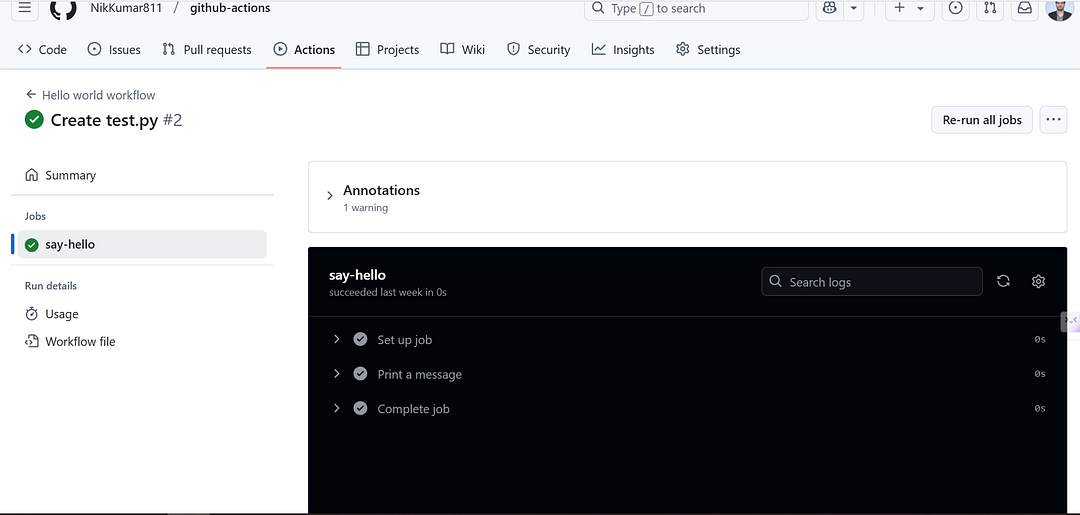
5. View Workflow Execution: Navigate to the “Actions” tab in your GitHub repository. Here, you will see the workflow triggered by the recent push.
Each step of the workflow is executed as defined, and the results can be viewed in real time.

For hands-on practice, visit the GitHub repository containing the example workflow discussed in this blog.
Key Features of GitHub Actions
- Native GitHub Integration: Directly integrated with GitHub repositories, making automation effortless.
- Reusable Actions: The marketplace offers pre-built actions to accelerate workflow creation.
- Scalability: Supports both simple and complex workflows, adaptable to various project needs.
GitHub Actions simplifies the automation of CI/CD processes, enabling developers to focus on writing quality code. By following this guide, you’ve taken the first step towards mastering this powerful tool. The “Hello World” workflow you created serves as a foundation for building more sophisticated workflows that can include security scans, code quality checks, and more.
Start exploring GitHub Actions today and unlock new levels of efficiency in your development pipeline. Have questions or tasks you’d like to automate? Share your thoughts in the comments below!
For more insights on mastering CI/CD with tools like GitHub Actions and Jenkins, don’t miss our detailed guide here: Mastering CI/CD with GitHub Actions and Jenkins.


Pingback: Automating Python Code Quality with PyLint using Github Actions - Techi Nik
Pingback: GitHub Actions — Branch-Specific Workflows - Techi Nik